Saturday, December 21, 2013

Dog Seax

I haven't posted in a while because I've been working on this:
It's a throw-caution-to-the-wind and do all the stuff I've been wanting to try project.  I call it the Dog Seax because I carved fighting dogs on the sheath, and names are handy for talking about stuff.  It's another seax (which is just a big medieval knife) in the Gotland style. It's 19" long with a 12" blade.  It stays fairly true to some historical examples, but I did go somewhat afield on a few things.

The most obvious departure is the blade carving.  Vikings didn't do this style of filework on their blades.  But seaxes have these nice long flat backs with almost no taper so they are just begging the have the back carved.  I've seen this pattern in art before, it's a fairly obvious one, but I haven't seen it on a blade spine so I decided to go for it.


 The handle is two intertwined serpents, and it was my first attempt to carve stabilized wood.  I was hoping that it would give me the best of both materials in terms of it's carving characteristics, but instead I got the worst. I still have to pay close attention to the grain direction of the wood, and the acrylic makes it harder to carve.  Also the vacuuming process to get the wood completely saturated with the acrylic removes a lot of the moisture, so the net result is a brittle, hard to carve substance with grain you have to pay careful attention to.  :-(
You can also see the second most obvious historical departure here - I put a bit of a guard on it.  The whole concept of having a perfectly straight handle that allows your hand to slide up onto the blade scares me.

One of the other things I've been meaning to try is embossing leather. This isn't the best picture, but these are the fighting dogs I named it for.  It was inspired by a viking carving, but the carving was a little too complex for my first try at leather so I did my own version of it.  It came out ok, but there's still a lot I have to learn. The coloring and shading is proving especially tricky.

Details for knife aficionados:  The blade was forged out of 1/4" 1084.  Flat grind, fully hardened.  There is basically no distal taper as you can probably tell from the photo.  I put it through 2 hour-long tempering sessions at 400 degrees.  The handle is stabilized maple with leather and brass washers.  The tang goes all the way to the end of the handle, and I fastened the tang on this and my previous seax by insetting a washer into the handle, tapping the tang, and putting a nut on it like this:
Whittle tangs are more authentic but I just can't bring myself to do that.  It's a weaker connection.  The washers and the butt plate are then nailed & epoxied onto the end of the handle.

All the metal fittings are brass, and the designs are either stamped or scraped into the sheet brass.  The leather is 8-10oz leather I got from Wickett & Craig in Pensylvania, and it's awesome.  It seems to work much better than the Tandy leather, and it's cheaper.  The only problem is they sell in whole hides, so you're buying in  25+ square feet increments.


Sunday, November 3, 2013

Coffin Handled Bowie

This is the third knife I've been working on in the hunting season threesome, though it ended up there by chance - no one is going hunting with this one (yet).


This style of Bowie was made in the 1800s in the US, and I really like them.  This one has a 9 1/2 inch blade of 1084.  I forged it from 3/16s stock so it's a slim blade that should cut very well. Like the hunting knives in the previous post this was heat-treated in my new digital furnace, and I can tell the difference - they are just a bit harder.  They ring at a higher note when you tap them. The real test will be how long they hold an edge.  To quote Roman Landis (a knife-making engineer who spoke at the last conference I went to): "Geometry cuts.  Heat treat determines for how long."

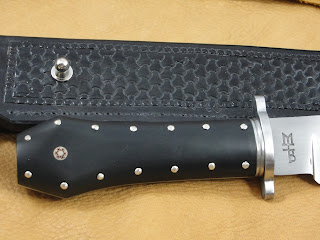
This is a frame handled knife - meaning the steel you see around the edge of the handle is not part of the blade, but is a frame slipped over the tang.  I should have taken a picture - trying to explain it further will be futile.  Anyways, the frame, guard, and the ring behind the guard are all 316 stainless steel.  The handle body is black micarta (a paper and resin composite) held on by 14 nickel silver pins.  The main pin in the middle of the handle is a 'mosaic' pin.  It's a tube of nickel silver with other smaller tubes and dowels of various metals slipped down it to make a pattern.  I buy it in 6" pieces from a supply house and cut it to size myself.
One thing I hate about pictures of knives is that cameras just can't capture the finish on blades.  Reflective metal surfaces really need to be moved so you can see the light play off them.  I finished this blade down to 600grit by hand, and I love the surface but it just doesn't come across in pictures:
You can get an idea of what it looks like in person from this picture.  It's kind of satin-y, but you can also see the reflection of the camera and my hand in the blade if you look at the right side.
I'll probably put this one up on Etsy.
 Next project is finishing a 12" blade-carved seax, and then a sgian-dubh (Scottish sock knife).


Thursday, October 24, 2013

Small Hunter

This is the second of the 3 knives I've been working on recently.  It's a small hunter for my second beta-tester.  He cleans lots of game every year and promises to give it a full workout.

The blade is 1084 carbon steel like all my recent knives.  This one also started as 3/16ths stock.  The blade is 3 inches long and a little over an inch at it's widest.  The handle is stabilized maple from my brothers wood pile again.  The sheath is only my second pouch sheath, and I ran into some odd problems dyeing it.  It must have gotten some contaminant on it, and so it looks weathered already.  Hopefully that will teach me to clean my work bench...

Sunday, October 20, 2013

The Deer Hunter

I've started doing my knives in small batches of 2 or 3, which makes the construction a bit more efficient, but means that my postings will get more clustered.  So here's the first installment of the hunting season cluster:
This is a deer hunters knife for a good friend who is also one of my beta-testers.  It's a deer hunter because the blade is a longer and proportionately narrower than a typical hunter.  My tester tells me that will help with the infamous sphincter removal cut.
His job this year is to take this knife and use the crap out of it, and let me know what he thinks.  The blade is 6" hammered out of 3/16ths 1084.  I ground it in the medieval style without a ricasso at his request.  He like the edge going all the way up to the guard.  Last years model made it through 2 deer, 6 rabbits, and a drop on the cement floor before he asked for the edge to be touched-up ("It's still sharp, but not crazy-sharp like before.").  Last years was 1075 heat treated by eye.  This one is 1084 heat treated in my new DIGITAL HEAT TREAT FURNACE!!!  Wooooo!!
So I'm hoping it will perform even better.  The handle is stabilized tiger-stripe maple from my brother's woodpile.
I kinda screwed up cutting it because the tigerstripes show more on the top and bottom of the handle than on the sides.  :-\  My fit & finish  is getting better - the seam between the maple and the pommel is perfect.  Between the guard and maple it's very close, but not quite perfect.  Once i can get them all perfect I'll be ready for the ABS journeyman smith test.

Saturday, September 28, 2013

Gotland Seax

Finally got another knife finished ( I have 6 in process -oi!).
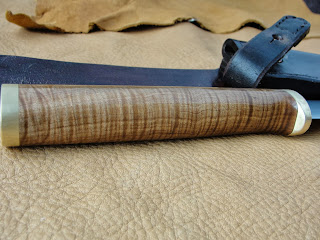
It's a Gotland style seax - a knife that was popular around 600-1000 AD in northern Europe.  This one is similar to a couple others I've made, but is truer to the historical seaxes. The blade is just shy of 10" long.  It's 1/4" thick at the base and doesn't taper much to the tip.  Distal taper (tapering the thickness of the blade over it's length) is not a feature found on these types of knives.  It's forged from 1085 carbon steel.  The handle is 5 3/4" long and is made from stabilized curly maple and brass, with two leather disks.  Overall length is 16" including the pull ring.  It's a big knife.
The dark lines in the handles are bug/worm holes.  They ended up getting filled by the acrylic resin I use to stabilize the handles.  The slight concave area in the bottom of the handle is a feature I added.  To this day Scandinavian knives have straight handles and no guards.  That scares the crap out of me.  I asked a knife design expert at a conference about it.  He said it scares the crap out of him too, and the only explanation he could offer was superior knife skills.  In any case, I wanted something to let my hand know when it was approaching the blade.
The sheath is 10oz tooling leather with the archetypal brass work of the Gotland seaxes.  I'll probably put it up on Etsy once I get a nice pull chain for it.  

Wednesday, September 4, 2013

A Little Protection

Some friends and I decided to start hitting each other with practice swords again like we did when we were in college.  Being old farts we're downgrading the weapons to rubber LARP swords, but we decided we still need armor.  So here's my first attempt at a pseudo-viking helm in cuir bouilli leather.


Sunday, August 25, 2013

Tentacled Dagger

Some knives you design, and other knives design themselves.  This one definitely designed itself.
It's the blade I made in J Arthur Loose's Viking Dagger class which I've posted before.  I wanted to have some continuity between the handle and the blade, and I got the idea of continuing the lines from the blade core into the handle, from there the lines took off on their own and became a mass of tentacles.  From that point on I was pretty much just along for the ride.
The wood in the handle is cherry and the fittings are brass.  The blade is 9' and overall it's 14" long.  It needs a sheath, but I have to take a break - the sheath it told me to make is pretty complicated  :-\

Monday, August 12, 2013

Making Damascus Steel

A few people have asked me how the Damascus steel blade I posted was made, so I thought I'd give a quick illustrated explanation (since pictures are so much better than words). So first let me start with a disambiguation of the term "Damascus steel".  This phrase is used for two very different things.

Medieval Damascus steel was a particular type of steel that western Europe associated with Damascus, Syria, because a lot of it passed into Europe from that city.  It was really good steel for the time and had this awesome watery pattern on the blade that was a result of the chemistry of the steel and the forging process.

Modern Damascus steel, which is what I'm going to explain, has nothing to do with the medieval stuff except that they both have cool patterns in the metal.  Modern Damascus is a bit like high temperature pastry:

Take pieces of two types of high carbon steel, one of which has a significant nickel content, and one of which does not.  Stack them up in alternating layers, and fasten them together.
Here's a layer-cake of steel with no nickel (the thick pieces) and nickel-bearing steel (the thin ones).  You can see a couple weld beads on the end of the stack.  Those are just to hold them together for the first operation.  The thick steel bar coming out the top is a handle, which is about to be welded on also.

Then you heat it the pile of steel and weld it together like this:
Or you an do it with a hammer.  But using a hydraulic press makes it really easy.  It squishes it into one big block of steel with 11 layers (in this case) just that easily. 
Next you stretch the block out using a hammer.  Hopefully a powerhammer, but otherwise it's just a lot of work with a hand hammer:

Next you slit the block in the middle and fold it back on itself:
Then you weld again, as above.  Now you have 22 layers.  You just keep going - 44 layers, 88, 176, 352, etc.  352 is near the top for layer count.  You could fold one more time for 704, but the lines of the pattern will be very, very thin at this point.  I think I stopped at 176 for my knife.

Bullshit Note:  When someone says a sword was "folded a thousand times.." they are full of it.  A thousand layers, sure.  But folded a thousand times is pure crap. They'd lose so much steel to oxidation in the fire that they have to start with a block the size of a refrigerator to make a knife.

Anyways, once you get the layer count you want, you do something to the block of steel ( the billet) to make a pattern.
You could do this:
 Or this:


Or any number of things to make a pattern out of the layers.  Once you are done you hammer the steel out into bar sized for making a knife, or sword, and proceed like any other knife.
Once the blade is done you do one extra step for Damascus, you dip it in ferric chloride for a bit, which eats away at the steel that has no nickel and turns it black.  The nickel bearing steel is largely unaffected.  The result is something like this:
This pattern is a result of twisting the billet, as in the picture above.  Damascus steel is a ton of work if you don't have any power equipment, but the result is very cool.

Thursday, June 27, 2013

Twisted Bowie

I posted this blade a while back, and I finally got a handle on it:

The fittings are 416 stainless steel and the handle is african blackwood that I carved in a spiral.  I picked the spiral for aesthetic reasons, but it also gives a really nice feeling grip.  You get a really solid hold.  The blade is 7" long and the whole knife is 12".  Now I just have to make a sheath and sharpen it...

Thursday, June 20, 2013

Flaming Spear

Ok, not really.  But the way this spear came out made me really happy:


It's made from an old Buck Bros. mortise chisel a friend picked up for me at a tag sale.  Woodworkers, before you kill me just let me say I intended to use it as a chisel but the back was so out of square it would have taken a ridiculous amount of grinding to fix it.  So I made it into a spear.
Whatever steel it was made of produced a pretty awesome hamon without me even trying.  The darker steel in the center did not get fully to the critical temperature, and so when quenched it forms a softer crystal structure that appears darker.  The outer edges did get to critical temp, and so formed a harder structure.  The hamon is what the Japanese call the transition line between the two. Having the softer steel in the center is actually good because it helps absorb shock, while the hard edge still cuts.  It's also pretty:

And very difficult to photograph.  The edges have a mirror polish to show off the wisps coming of the dark center, which leads to this:
Wave to the photographer in the blade.  But it does show in the upper center how the blade tend to look in person.  The center appear lighter and the edges look dark with white wisps coming off it.  Maybe a light tent with a black background would work...


Wednesday, May 22, 2013

The String in the Steel

I spent most of last week at NESM in a Viking dagger class with J. Arthur Loose
Where I made this dagger.  It's 9.5 " long and made in the style of viking blades where a core of multiple bars is wrapped in an edge.  Here's a picture of the blade when the edge was prepared to weld, which pretty much explains what I'm talking about:
You can see the pattern of the core near the bottom.  I was trying to do a pattern called the serpent in the steel, but things didn't work out right and what I ended up with looks more like Spaghetti or strings in the steel :-\
 Being the anal-retentive detail freak I am, I was worried about a very thin line in the blade right on the main ridge.  I was afraid a weld hadn't taken -- so I discovered a new use for my digital microscope!  Weld inspection!


It was not a crack, but a dark line of weld inclusions with a few super tiny cavities where some flux must have gotten trapped.  This cavity is actually in the middle of the picture above.

In any case - it was a great class and I learned a huge amount.  Now I just need a hydraulic press and some time off...

Thursday, May 9, 2013

What is sharp?

One question that nags me as a knife maker is what counts as sharp?  How do we quantify sharp?  I've had people hand me a 'sharp' knife and wondered what counted as dull for them - a rolling pin perhaps?  I've watched lots of demonstrations that show how sharp some implement is, but they all have their problems.

The best demo I ever saw was a swordsman take a katana and slice a bamboo pole wrapped in a japanese mat into multiple pieces. "This is why people think the katana is such a good sword" he said "because it is so sharp.  But watch this..."  He pulled out a medieval broadsword with an edge like a typical butter knife, and proceeded to do the exact same slicing demo.  He cut the mat-wrapped pole into multiple pieces.
To me, what this demo shows is that it's very hard to know what's sharp because demos involve way to many other factors, and the fact that sharp is invisible to the naked eye.

Howard Schechter of The Perfect Edge crystallized this thought for me at a demo he gave.  He also showed me how to get past this problem - a digital USB microscope.  Now I have some way to judge sharpness - I can look at it!  So here's a few 'sharp' things I've seen with my microscope:

The first thing on the left is a hair.  It's for scale.  All these shots are taken at the same ~207x that my cheapie microscope focuses at.
Next is a steak knife we use all the time.  When people tell me they have a sharp kitchen knife at best about this sharp.  It goes through steak just fine, and my daughter cut her finger with it just the other day.  But here it looks round.
Next is a knife I sharpened on a 220grit stone.  It's sharp enough to shave hair.  Very grabby - it feels sharp.  Most people I know would describe this as "wicked sharp".  It's definitely better than the steak knife, but look at that white line.  That's the light bouncing back off the flat spots on the edge.
The next edge is sharpened down to 600 grit, and the flat spots on the edge are much thinner.  At this point the edge is smooth enough that it doesn't feel sharp anymore.  The grabbiness is gone, but it cuts very well.
This trend continue down the 16,000 grit edge where the flat spots on the edge have almost disappeared.  Sharp is becoming invisible again.  This level of sharpness is scary, because you don't feel it cutting you anymore - you just start bleeding.  Then it starts hurting  I sharpen my woodworking chisels to this level so I know this from experience.
The last shot is a typical single edge razor blade like you scrape paint with.  Sharp has gone invisible again.

The important part for me is now I have a way to judge sharpness & edge-holding.  Sharpen the knife, take a picture of the edge, do a prescribed set of cutting activities (like cutting shipping tubing), and then take another picture of the edge and see what happened!
What does happen?  That will be another post, where I do the same cutting with one of my knives and a couple very expensive commercial kitchen knives...

Sunday, April 28, 2013

Rolling with Failure

I just finished  a knife this weekend, and it's journey is interesting to me philosophically (WARNING!!!   Impending Bullshit!  Impending Bullshit!).
So I made this kitchen knife for my beta-tester Scotty:
It seemed like a good knife.  He took it home and cut a chicken in half like it was nothing.  But then the knife went dull - ack!  At first I thought I'd blown the heat-treat and it was soft, but that wasn't the case.  I had used a sharpening guide, and with the wide blade it had given the edge too steep an angle for kitchen use.  It might have been good on a scalpel, but the edge rolled over in the kitchen.

  • Failure lesson #1 - the angle of the edge really does matter, down to a few degrees.

So Scotty took it back and while the edge was fine now, the blade itself was simply too thick to be useful in the kitchen.  It kept getting stuck in food before it went all the way through.

  • Failure lesson #2 - the thickness of the blade down to the 1/16th really does matter a lot.

So not wanting to waste this blade that was a failure as a kitchen knife, I decide to make it into a bowie where the thickness would be a good thing.
This gave me an opportunity to try a frame handle and bone as a handle material.  The knife came out OK  but I learned more lessons:

  • #3 - bone is brittle.  When you are hammering that decorative pin through to anchor the handle on and it sticks at little - don't hit it a little harder!  I chipped out a chunk the size of my thumb pad.
  • #4 - don't leave the knife on the bench when you are staining the sheath.. You will flick black stain on the nice white bone and be forced to stain it too, resulting in a not-so-great look.
I've decided to boil the philosophy down to it's most pure form, the fortune cookie saying:
Failure is opportunity in disguise.
It might be the opportunity to fail a whole lot more, but if you brain is turned on you'll learn a shit-load.

Saturday, April 20, 2013

Humidor

This is a first attempt at a humidor for my lumber-jerking partner Scotty.  He never wants the wood, he just likes to make boards (go figure).
So with the exception of the Spanish cedar liner, this humidor was made entirely from trees Scotty and I cut and processed.  The main body is black cherry and the edging is black walnut.
It came out ok for a first attempt, but I'm definitely not a professional furniture maker.  If you got to inspect it up close you'd see why.  Now Scotty will have to test it and see how well it functions as a humidor (fingers crossed).

Tuesday, April 16, 2013

Prom Dagger

I finished this dagger the night of my daughters prom, and so it became known as the Prom Dagger because of that and the fact that it went so well with my daughters dress.  This is probably the most 'delicate' blade I've made.
The blade is 9 1/2" long and made from W1.  Fittings are brass and the handle & sheath are made from cocobolo.
The fitting came out ok.  One of the more interesting and challenging parts of being a knife maker is that you really have to master a number of skill areas.  In the case of fitting like this you are doing the work that used to be done by jewelers.  I've got a long way to go when it comes to being a jeweler...

Wednesday, April 10, 2013

Long Bow

This is what I generally shoot my arrows out of:
It's a...   well, it's a 6 foot recurve-decurve flatbow.  What does that mean?  It means that the arms of the bow have flat cross-section like most bows you've seen, that the arms curve back away from the handle but then bend forward again at the tips.  And at 6' long it's definitely a long bow.  It's made of bamboo on the front and ipe (the dark wood) on the back and handle.  Ipe is a super hard tropical wood used mostly for decks, but it also makes great bows.  The pull weight is 48 lbs, so it can toss an arrow fairly hard, and that's about all I can comfortably shoot - though I am working on a 55lb pull bow so I can slowly man-up.
The other design feature of this bow is that it has a somewhat static recurve - meaning it doesn't bend much.  If you look at this picture of the front you'll notice the limbs get very thin in width about 2/3rds of the way to the tip.  They also thicken up, which you can see in the first shot.  This helps the bow throw the arrow faster than if it flexed all the way out to the tip.
My favorite part of this bow is the handle.  The shape is very comfortable to use, and nice to look at.

Saturday, April 6, 2013

Odd Bodkins

And now for something completely different...
Some pseudo-medieval arrows.  I say pseudo because the actual bodkin-tipped arrows used in medieval times were much bigger.  The arrows recovered from the wreck of the Mary Rose have shaft diameters of 1/2" near the tip.  These are built on modern arrows standards which are just under 3/8ths.

So anyways, these are made of commercial bodkin tips I bought (bodkins are pyramidal shaped points designed to pierce armor), black walnut shafts I cut myself from lumber I cut from a tree I felled.
The fletching is commercial feathers that I cut to shape.  I would have liked to process my own feathers but first I have to make friends with some goose hunters.  The feathers are glued on and then wrapped with silk string.  The nocks are carved into the shaft by hand, and the dark strips are inserts of buffalo horn to keep the nocks from splitting.  These ones are overly thick, but they work.

I used these arrows in the great battle against the Hippie Scoobie-Doo, and between the hard-wood shafts and the bodkin tips they really out-did the target arrows in setting Scoobie back on his ass:

Thursday, April 4, 2013

A Grey Blade

I made this knife about a year ago.  It's another case of an accidental hamon from differential hardening - only part of the blade was above the critical temperature to form truly hard steel.
The lighter colored section toward the back of the blade is softer than the rest of the blade.  I left the blade etched grey like this because I thought the patterns in it were really interesting.
The blade is 8" long and made from 1/4" thick 1075.  The fittings are 416 stainless steel, and the handle is carved micarta (resin & paper).